


Warning!
This Content was created in 2018 and Caldera has changed a lot since then. Content and steps might be outdated.
Introduction
MITRE's CALDERA project rocks! It emulates adversarial actions on a network. These instructions will guide you through installing and running your first operation. These instructions also work as-is for a Raspberry pi! The performance on the pi is limiting, but its worth it for portability and demos for clients. I don't recommend using CALDERA on a pi if testing in a lab with more than 5 hosts, perhaps an odroid would work better.
Prerequisites
You'll need the following:
- Ubuntu 16.04 server or Raspberry pi 2
- 15 minutes of your time
Step 1 - Installing caldera
Install dependencies
apt-get -y install python3-dev python3-pip git-core mongodbMake sure setup-tools in up to date
pip3 install --upgrade setuptoolsDownload CALDERA
git clone https://github.com/mitre/calderaInstall CALDERA. cd into the caldera/caldera directory and run:
pip3 install -r requirements.txtPrep database
echo "replSet = caldera" >> /etc/mongodb.confRestart the database with
systemctl restart mongodb.service.Download crater, CALDERA's RAT.
Make sure you are in the caldera directory (not caldera/caldera), then run:
 mkdir -p dep/crater/crater && cd dep/crater/crater
 wget https://github.com/mitre/caldera-crater/releases/download/v0.1.0/CraterMainWin7.exe
 wget https://github.com/mitre/caldera-crater/releases/download/v0.1.0/CraterMainWin8up.exe
 ln -s CraterMainWin8up.exe CraterMain.exe
Run CALDERA from the following directory caldera/caldera.
python3 caldera.pyYou should be able to login to the UI at
https://CALDERAIP:8888Note: default credentials areadmin:caldera
Optional - In preparation for step 2. You can download the required agent software (cagent and visual c++ redistributable) to the server so agents can easily download locally. Handy for a portable setup on the pi.
 cd ~/
 wget https://download.microsoft.com/download/9/3/F/93FCF1E7-E6A4-478B-96E7-D4B285925B00/vc_redist.x64.exe
 wget https://github.com/mitre/caldera-agent/releases/download/v0.1.0/cagent.exe
You can host a python web server to download these:
python -m SimpleHTTPServer
Step 2 - Setup agents
On your lab systems:
Install Visual C++ Redistributable
Create directory
c:\Program Files\cagent. Download the agent's configuration file from your CALDERA serverhttps://YOUR-CALDERA-SERVER:8888/conf.ymland save it to the c:\program files\cagent directory. Download and save the agent.NOTE: you may need to edit the
conf.ymlif DNS doesn't work in your lab.
Open an administrative command prompt, and in the c:\program files\cagent directory perform the following:
 cagent.exe --startup auto install
 cagent.exe start
If all goes well you'll see the agent under Debug>Connected Agents

You can verify agents are working by sending commands to the agent under Debug>Send Command feature.

Step 3 - Setup and launch an adversary operation
CALDERA needs to know 3 things before you can launch an operation.
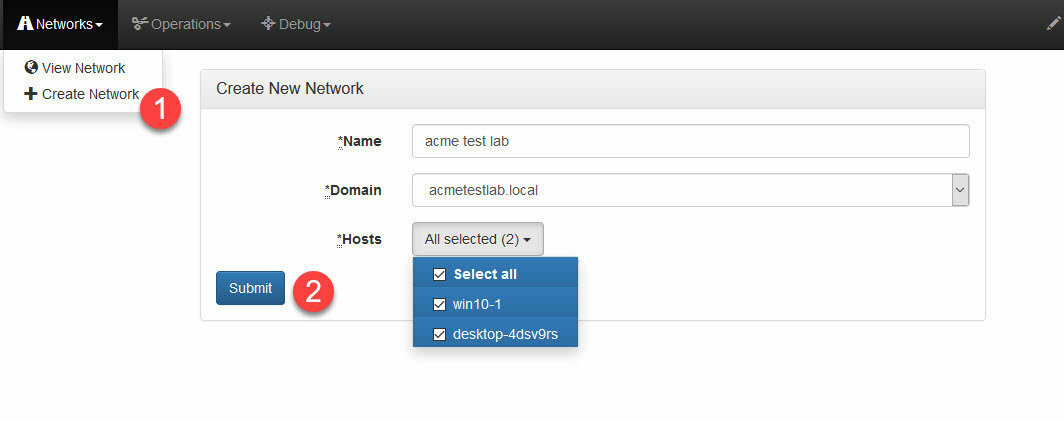
Setup your network and assign hosts
 Creat an adversary (or choose a builtin)
 Create an operation
 After you create the operation, CALDERA automatically kicks off the operation after you create it. Here it is in action:

References
CALDERA github repo
CALDERA documentation
BlackHat presenation on CALDERA by Andy Applebaum and Doug Miller
Tips and Troubleshooting
- If you re-ip an agent and keep the same hostname, you will run into issues. CALDERA will always pick old/stale entry and you wont be able to purge it via UI. You'll have to modify the database.
- remove agents with
cagent.exe remove - Even default installs of Windows 10 will flag PowerView as malicious and CALDERA will fail to successfully execute some steps that require it.
To work around this, use CALDERA's script editor to modify the powerview-ps1 script or better would be to obfuscate it. NOTE: You must use the script editor since the files are stored in binary.
Alternatively you can disable Windows Defender to have all tests succeed. Edit GPO:
comp configuration > admin templates > windows components > windows defender - The agent is designed to run under a domain users context. Start it with domain user like so:
cagent.exe --username DOMAIN\bjames --password SECRET start


